Calling upon Transcontinental winner Josh Ibbett and our latest addition to the Hunt team and Great Divide rider, Jim Barrow, we took their extensive experience to find out more about using dynamos.
This article aims to focus on the various devices/setups Jim has tried over the years as well as the current improvements he has planned. Expect in the coming weeks to see how Josh Ibbett uses his dynamo during a bike packing trip/race with a focus around real-world usage.

Hi, Jimbo here, I’m one of the newer members of staff at Hunt Wheels. I’ve been mountain biking for over thirty years, I’ve raced XC, Enduro (the old type and the new!), 12 and 24-hour events both team and solo, road, TT, and CX! I’ve been guiding local MTB rides since 1993, both for local shops and for www.sussex-mtb.com, which is the ragtag bunch that I try to organize. Just to top it off I am an MTB skills coach too! www.southdownsmtbskills.com
In September 2013 my neighbour insisted that I went for a bivvy trip with him, I really wasn’t sure but I said yes, and the rest is history. I’ve since spent many nights in a bivvy bag. Eventually after being inspired by my friend Jenn I ended up at the top of the Great Divide Mountainbike Route with my son in 2016 and a great adventure unfolded.
Obviously, a lot of research was done on bike set up and especially lights and charging. Below are the systems that I have used and how I got on with them. People are of course developing new stuff constantly and there is a good choice out there now.
Great Divide Set Up: Alberta, Canada to Antelope Wells, New Mexico.
So this was the set up I used for the Divide, it was bombproof and faultless. At the time the front hub was an SP Dynamo one, but this has been replaced since with a SON one for two reasons: 1) The SP hub on Tom’s bike failed on the divide ride and I wanted to fit something bombproof for future adventures. 2) The SON hub has a higher output at lower speeds.

So for the lights both Tom and I had the excellent Exposure Revo front and rear lights. This is a no-nonsense lamp that is absolutely faultless, they are a local company too so what’s not to like? I have their other battery bar and helmet lights for when I am doing ‘normal’ MTB rides, so they were an obvious choice as I know they have excellent build quality and support after purchase is great.
At 10MPH the output is 400 lumens and at 15MPH that goes up to 800 lumens, in practice this is fine if you are on your own or riding with other people with dynamo lights, however you will find it is not enough if you are riding in a group with people with high power lights, but to be totally fair this isn’t what it is designed for. In terms of convenience and having the power there to use at any time they are hard to beat.

Jim's Great Divide Set Up: Exposure Revo.
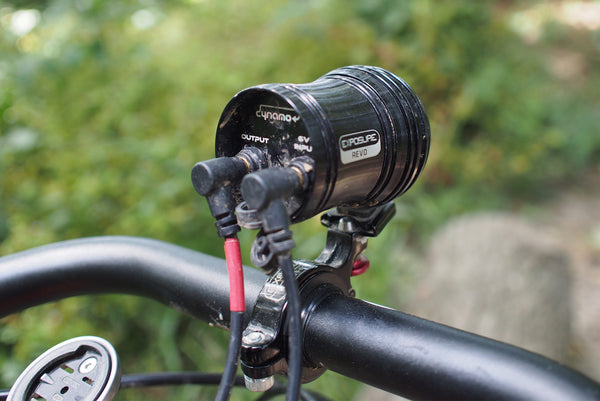
Jim's Great Divide Set Up: Exposure Revo rear view (Note: the small piece of electrical tape Jim uses to remind him of what is the output cable connected to his rear light).
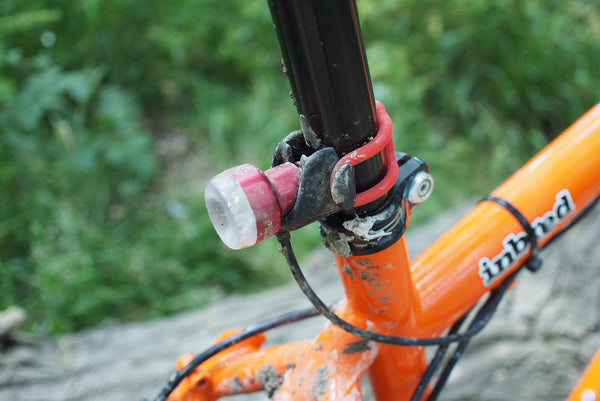
Jim uses the tried and trusted Exposure Revo rear light.
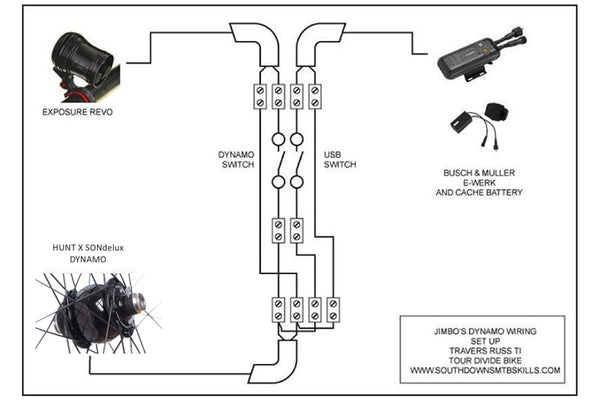
Here is a break-down of the connections Jim uses. Notice the switch in the center of this diagram - this is a slightly custom piece made by Jim, but you could achieve this by simply unplugging the cords. However, we agree that this is a far neater and user-friendly solution.
For the charging side of things, we had two different setups. Tom had the Cinq5 Plug and cache battery, I had the Busch and Muller E-Werk and cache battery. Both worked fine for the trip. I made myself a switch box which allowed me to switch both the light and the charging facility independently.
The Cinq 5 Plug is a really neat looking unit, it’s compact and it fits into the steerer tube of your bike. This can be a double-edged sword though, the bike I originally had it on was a CX with a carbon fork, there was no hole in the bottom of the steerer so I had it and all the associated wiring in a top tube bag. Eventually, after the divide trip, it went on to one of my 29ers and I was able to fit it properly, though subsequently it eventually failed, as did it’s cache battery.
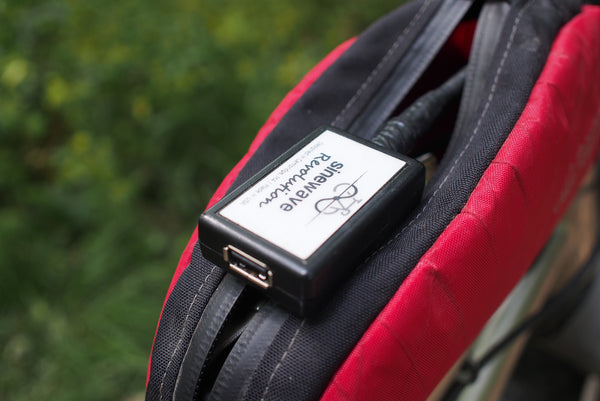
Jim uses the K-Lite Sinewave Cycles Revolution port over the Cinq 5 option due to not having a hole at the bottom of his steerer tube on his carbon gravel fork.
Current Set-Up
More recently I’ve switched over to the K-Lite, it is more compact and brighter than the Revo, but my real motivation was because that’s what most of the recent Tour Divide winners have used and I wanted to see what all the fuss is about. The output is 700 lumens on low and 1200 lumens on high, so quite a bit brighter than the Revo. I can’t comment on longevity yet as I haven’t had it long, though I did get it second hand off a mate. The one plus for me is that it is brighter at a lower speed, so really good for climbing on a fully loaded MTB.
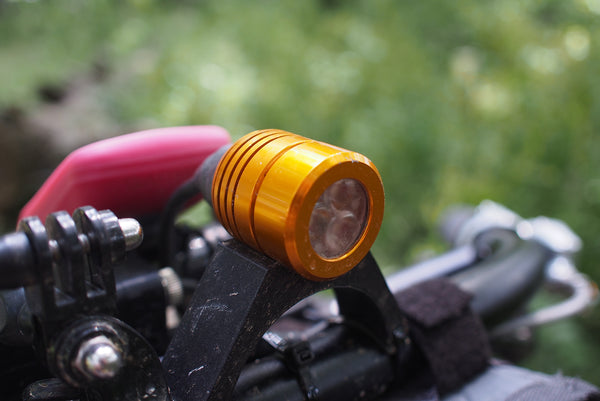
Jim is now experimenting with the K-Lite over the Exposure to see how they compare.
The one big appeal of the K-Lite for me was the fact all this is integrated, charging and lighting is all attached via a purpose made wiring harness and switch. I have chatted to Kerry from K-Lite on Facebook and he is a really nice guy, happy to respond to any questions and happy to give advice. I am actually going to modify the set up a little once I have got the correct plugs. So no doubt there will be more to follow on that. I really like the B & M E-Werk, so I’m going to try running a combination of the K-Lite lamp and the B & M charger. Also, I need to add in a rear light. I’ll see how that works and no doubt report back in the future…
-
So there you have it, a few different choices and ways to keep you both lit up and keep your gadgets charged on a multi-day trip.
Photo and Words Credit: Jim Barrow